Familiarize with the Amazon Textract API
Time Estimate: 10 - 15 minutes
In this section we are going to process 3 documents using the Amazon Textract API. Those documents are:
1. An image file called “simple-document-image.jpg” stored on our local disc using synchronous Textract APIs.
2. The same image file as above but now stored in an Amazon S3 bucket using synchronous Textract APIs.
3. A pdf document called “Amazon-Textract-Pdf.pdf” stored in an Amazon S3 bucket using asynchronous Textract APIs.
We are going to use AWS Cloud9 to achieve the above.
Connect to Cloud9
Go to the AWS Cloud9 console and click on Your environments (you may need to expand the left sidebar).
What is AWS Cloud9?
AWS Cloud9 is a cloud-based integrated development environment (IDE) that lets you write, run, and debug your code with just an internet browser. It includes a code editor, debugger, and terminal. Cloud9 also provides a seamless experience for developing serverless applications enabling you to easily define resources, debug, and switch between local and remote execution of serverless applications. In this project, we are launching Cloud9 on its own EC2 instance, but you can also connect Cloud9 to an existing Linux server.
For more information, see https://aws.amazon.com/cloud9/.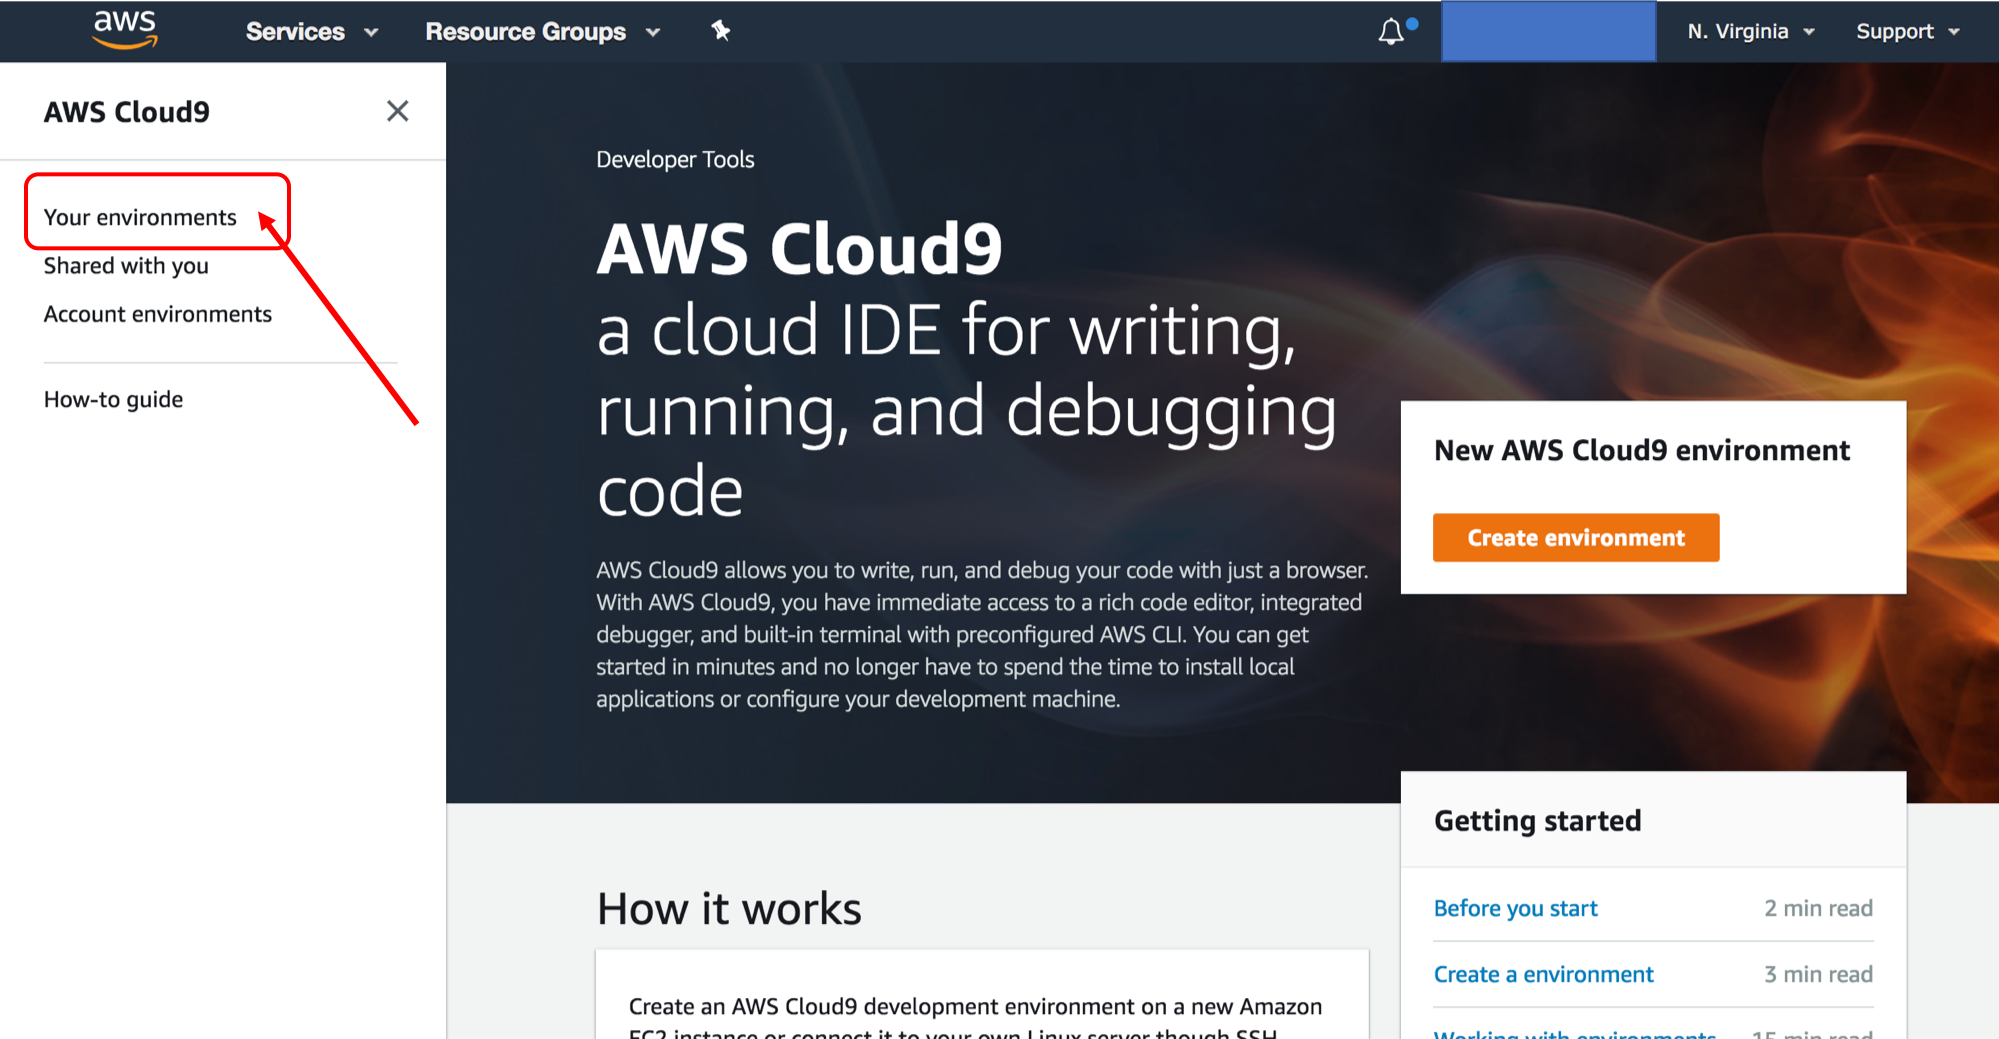
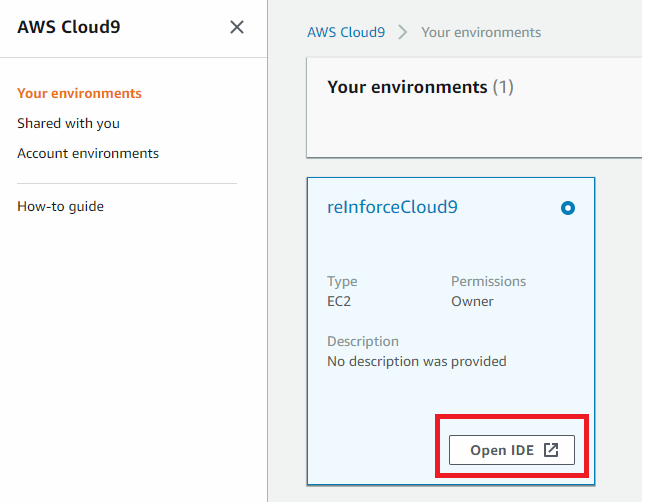
Find the reInventCloud9 environment and click the Open IDE button as following:
If you have trouble opening Cloud9:
- Ensure you are use either Chrome or Firefox browser.
- Refer to the troubleshooting guide here to ensure third-party cookies is enabled.
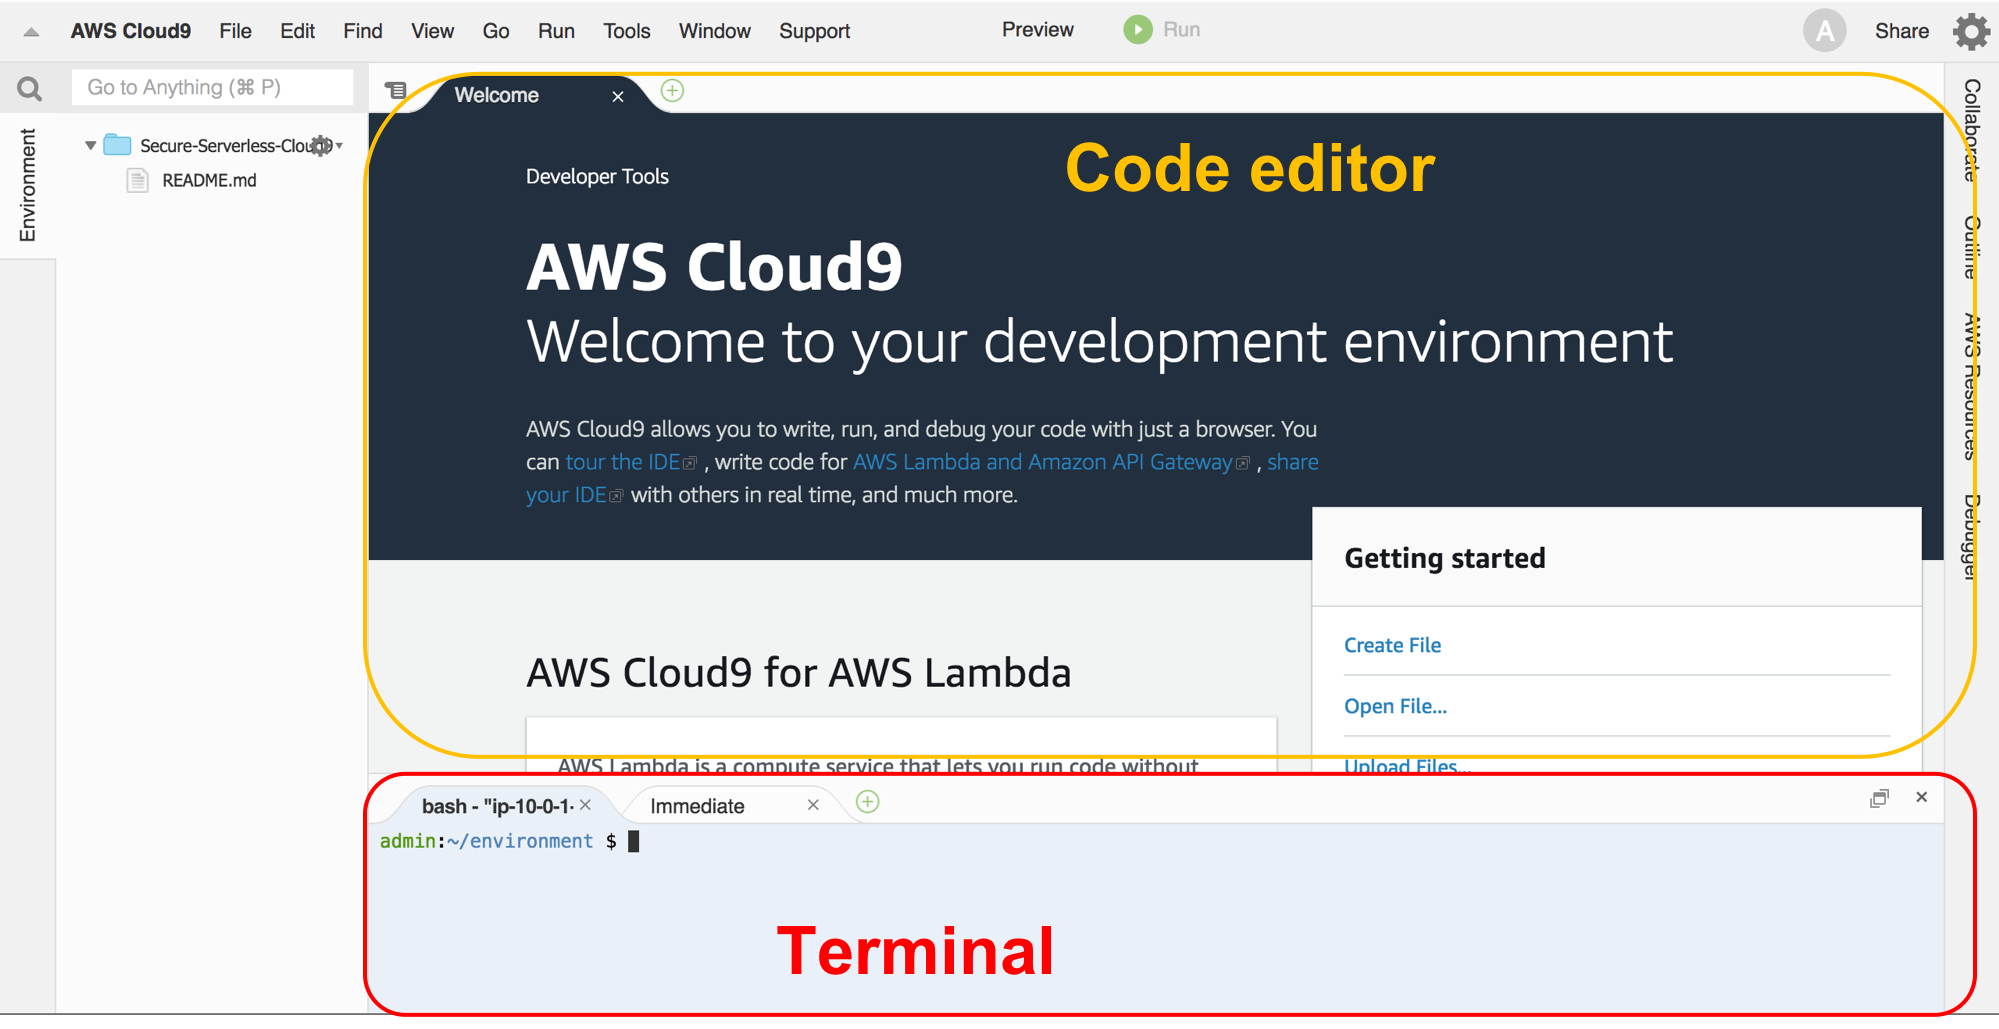
You should now see an integrated development environment (IDE) as shown below. You can view and edit files in the editor and run shell commands in the terminal section just like you would on a local computer.
In Cloud9, run the following commands in the terminal:
You will run all terminal commands for this module from within Cloud9 (not your local machine). Keep in mind that Cloud9 is a fully fledged IDE running on an Amazon EC2 instance. You can edit code and create new files via the Cloud9 editor in your browser. You can also open multiple terminals if needed.
All of the terminal commands in these modules can be copy/pasted to your Cloud9 terminal for execution.
Execute the commands below to set up python and clone the repo with the Textract samples
# Set up python
virtualenv --version
which python
unalias python
python --version
python3 --version
which python36
cd ~/environment/
virtualenv -p /usr/bin/python36 vpy36
source vpy36/bin/activate
python --version
deactivate
alias python=/usr/bin/python27
# Clone this repo on your Cloud9 machine by typing the command below in the terminal:
git clone https://github.com/aws-samples/amazon-textract-code-samples.git# Navigate to the the folder below where you can find all the python scripts calling the Amazon Textract API
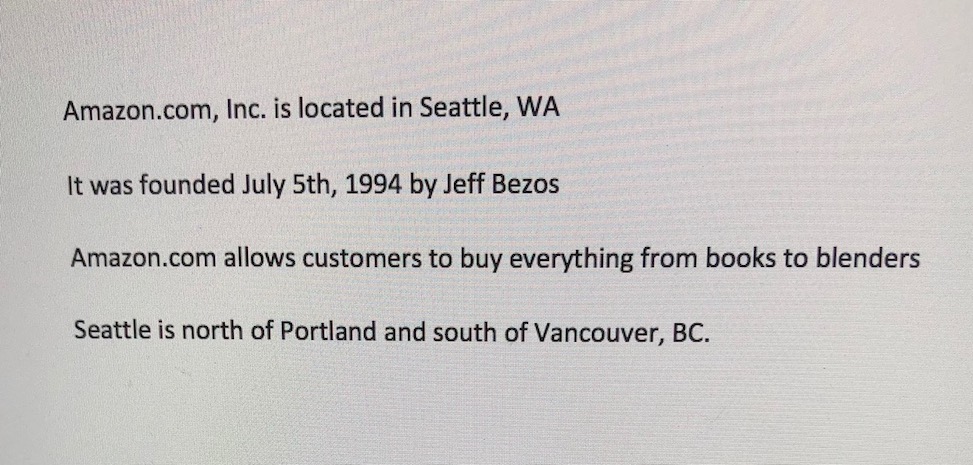
cd amazon-textract-code-samples/python/1. We are now going to process the image file on our local disk in Cloud9 using the Amazon Textract synchronous APIs. This is the image file below:
# Execute the python script below to process the above image
python 01-detect-text-local.py
The output of the command should be the raw text of the above image.
# Inspect the code in the script 01-detect-text-local.py
cat 01-detect-text-local.py
Within the 01-detect-text-local.py python script see below the point where we are calling the Amazon Textract synchronous API. Do not execute the command below as it is only to help you inspect code.
.
.
# Calling Amazon Textract detect_document_text
response = textract.detect_document_text(Document={'Bytes': imageBytes})
.
.
2. We are now going to process the same image file stored in Amazon S3 using the Amazon Textract synchronous APIs. Execute the script below:
# Execute the python script below to process the same image stored in Amazon S3
python 02-detect-text-s3.py
You should see the same output with when you executed 01-detect-text-local.py script.
# Inspect the code in the script 02-detect-text-s3.py
cat 02-detect-text-s3.py
3. We are now going to process Amazon-Textract-Pdf.pdf stored in Amazon S3 using the Amazon Textract asynchronous APIs. Execute the script below:
# Execute the python script below to process the pdf document
python 12-pdf-text.py
Are you observing the different behaviour of the asynchronous Textract API?
# Inspect the code in the script 12-pdf-text.py
cat 12-pdf-text.py
We are now using the asyncronous Amazon Textract API: start_document_text_detection to process the pdf document.
.
.
response = client.start_document_text_detection(
    DocumentLocation={
        'S3Object': {
            'Bucket': s3BucketName,
            'Name': objectName
        }
.
.
Experiment with other scripts if you want that leverage machine learning APIs like Amazon Translate. Once you finish proceed to the first Module 1 - Synchronous Processing.